Email and notifications
Connect Scops to your mail server, set who the mails come from, keep the recipients, and forward alerts as traps.
Before you begin
- You need Manage Settings.
- The Scops server must reach the mail server and the trap address. See Ports and network.
Connect the mail server
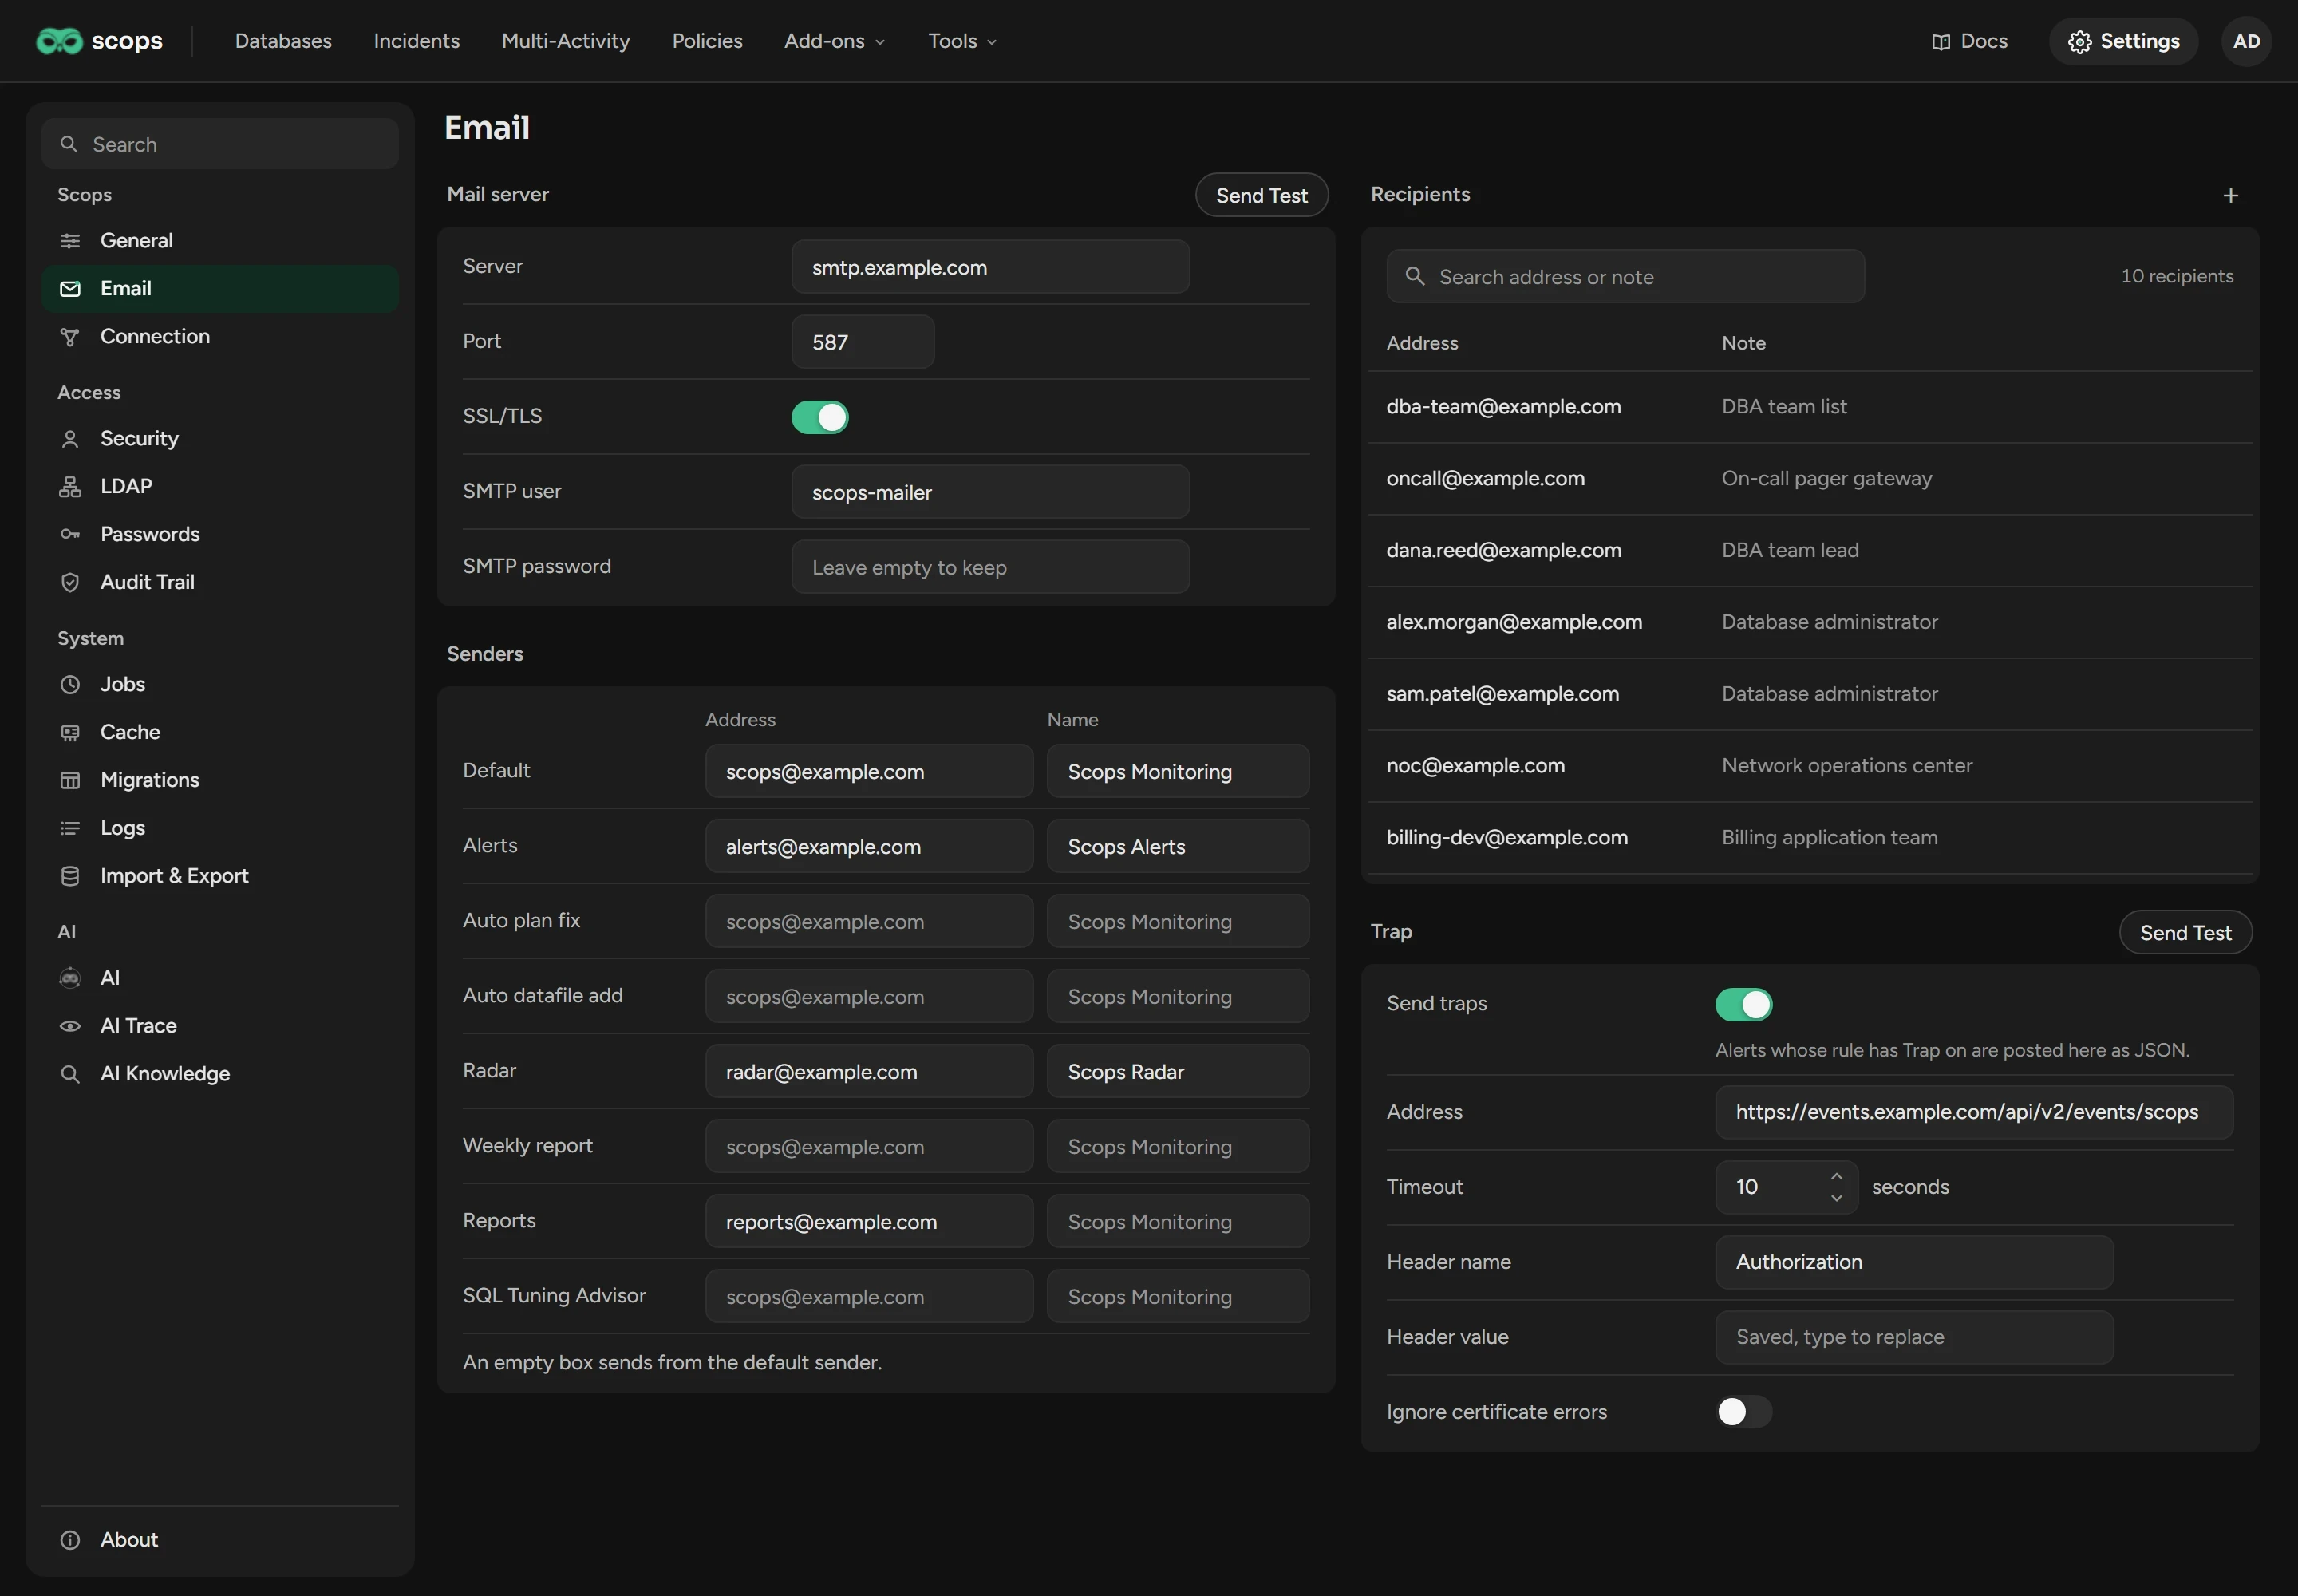
Open Settings › Email.
Under Mail server, type the Server and the Port. For an encrypted connection, turn on SSL/TLS.
If the server needs a sign-in, type the SMTP user and the SMTP password.
Under Senders, type the Default address and name.
Click Save, then send a test mail.
If the server refuses the first mail of an alert, Scops tries again at each check.
Send a test mail
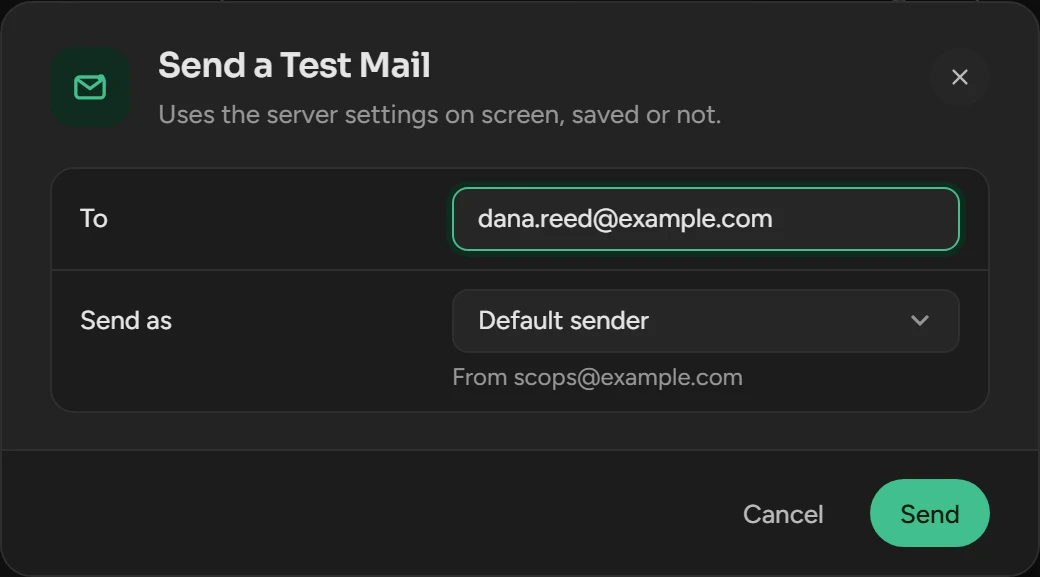
Click Send Test in the header of Mail server. The test uses the settings on the screen, also if they are not saved.
Type the address in To.
Under Send as, keep Default sender, or select a mail type to test its sender.
Click Send. A message shows that the server accepted the mail, or shows its error.
Set the admin address
Scops mails its own critical alerts, for example a full or unreachable repository, to the admin address.
In Administrator, type the Admin address and click Save.
Click Send Test. The result shows under the group.
See Health.
Set the sender of a mail type
Under Senders, type an address and a name next to the mail type. An empty box uses the default sender.
Click Save.
The mail types are Alerts, Auto plan fix, Auto datafile add, Radar, Weekly report, Reports and SQL Tuning Advisor. Point at a type to see what it sends.
Recipients
Recipients is the address book for alerts, Radar and reports.
| To | Do this |
|---|---|
| Add a recipient | Click +. Type the Address and a Note, then click Add. |
| Change a recipient | Click its row. The new address applies everywhere that the recipient is selected. |
| Remove a recipient | Click the bin. You cannot remove a recipient that a rule or a report uses. |
Forward alerts as traps
A trap is an alert that Scops posts as JSON to the REST address of another system. An alert rule sends traps when its Trap switch is on.
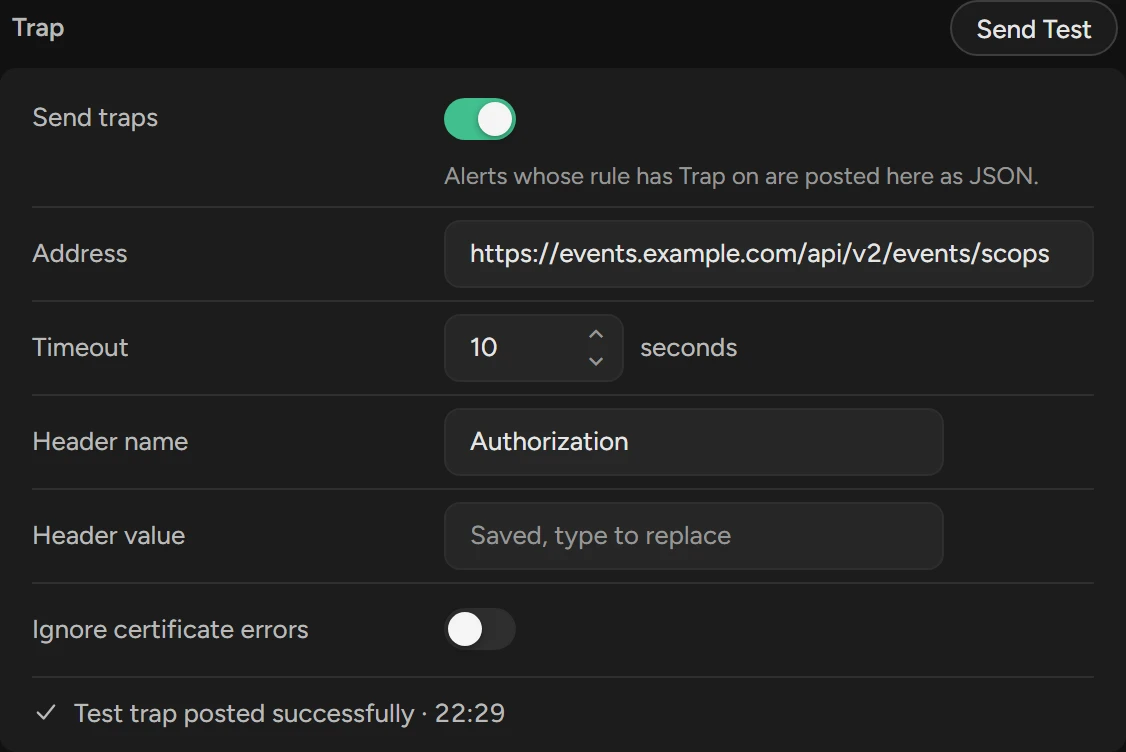
Under Trap, turn on Send traps.
Type the Address. Set the Timeout: 1 to 120 seconds, 10 by default.
If the address needs a key, type the Header name and the Header value.
Turn on Ignore certificate errors only if the Scops server does not trust the certificate.
Click Save, then Send Test. Scops posts a test alert with the status
TEST.
Scops posts one trap per database, with the status ALERT when an alert opens and CLEAR when it clears. Reminders send no trap. If the address does not answer within the timeout, Scops does not try again.
Related
Updated November 9, 2026